
· 7 min read
Deploy Bun with Github Action to AWS automagically
This article will help you how to set up a basic Github Actions workflow to deploy your application and a Bun Lambda layer to AWS.

· 7 min read
This article will help you how to set up a basic Github Actions workflow to deploy your application and a Bun Lambda layer to AWS.
In the previous article I provided you a tutorial with a simple example about how you can deploy a Bun layer and an application to AWS manually from your local machine. I also promised you a guide on how to do it automatically using GitHub Actions and Gitlab CI as well. This article will help you how to set up a basic Github Actions workflow to deploy your application and a Bun Lambda layer to AWS.
Click HERE to check the previous article.
I have divided this guide into two main blocks, the first one will show you how to set up the environment, while the other one will focus on the workflow files.
Our workflow will need permission to access our AWS account, so we have to provide an AWS Access Key and Secret Access Key. It is highly recommended to provide them as a secret for obvious security reasons.
How to create a secret:

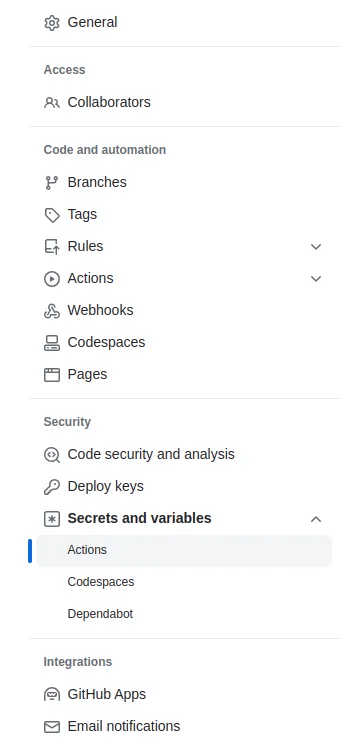
Select New repository secret
Provide a name and the content of the secret then click Add secret.
Besides the access keys we can create other variables as secrets, for our example workflow I recommend you to create the following secrets:
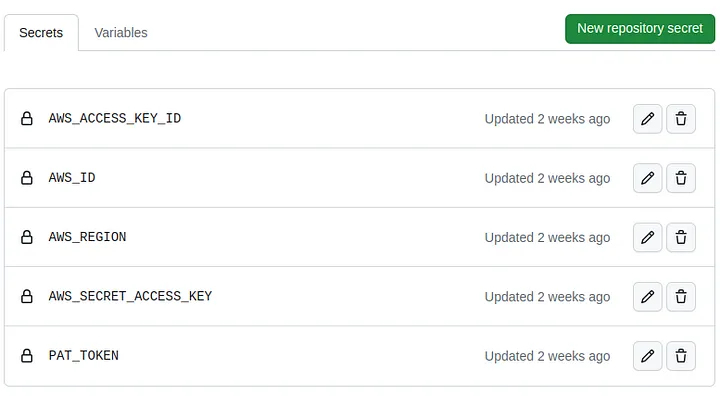
PAT_TOKEN is a Personal Access Token, see the next step on how to create it.
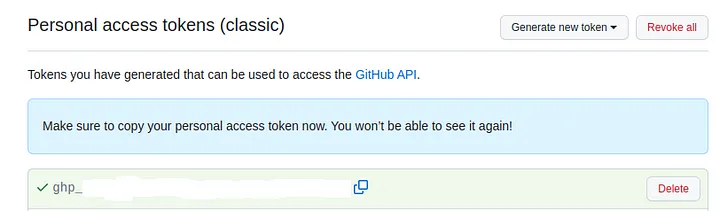
Our workflow will need permissions to access and make actions with GitHub repositories and for that we need to create a Personal Access Token and provide it as a secret. This way we will be able to refer to it from the workflow files.
How to create a PAT:
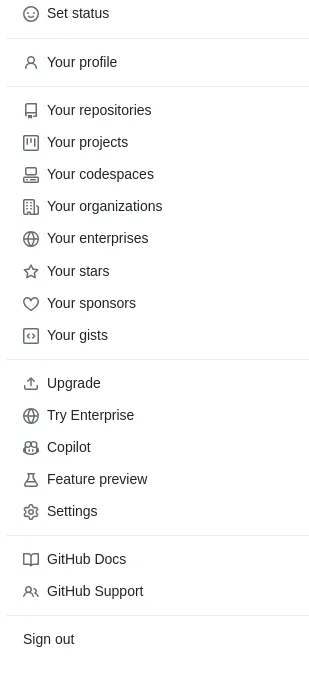
On the left side at the bottom select Developer settings
Under Personal access tokens select Tokens (classic)
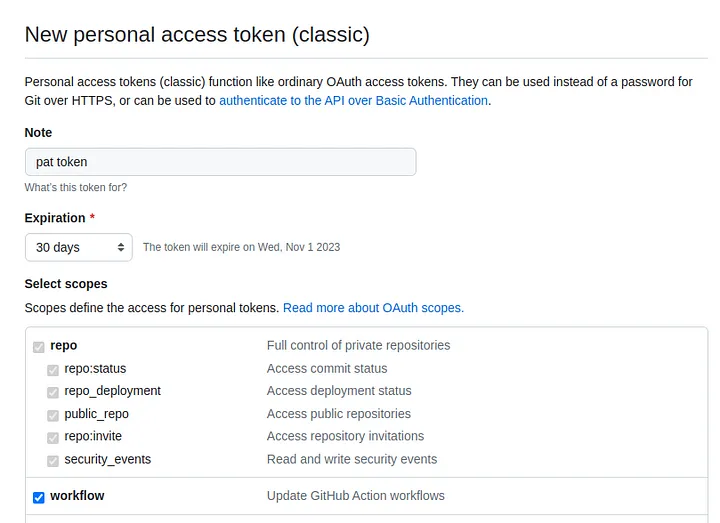
Select Generate new token (classic)
Now add a short description, set the expiration period and tick repo and workflow then click Generate token
Our workflow will be able to deploy an application as a Lambda function, and for that we need to provide it in the repository. To do so, simply copy your application files into the app folder. In our example we use a simple TypeScript file:
index.ts
export default {
  async fetch(request: Request): Promise<Response> {
    console.log(request.headers.get("x-amzn-function-arn"));
    // ...
    return new Response("Hello CodeFactory", {
      status: 200,
      headers: {
        "Content-Type": "text/plain",
      },
    });
  },
};The first thing we need to deploy is a Bun Lambda layer which will provide a running environment for our application. Create a publish-bun.yml file into the .github/workflows folder and copy the following code in it:
publish-bun.yml
name: Setup and publish Bun
on:
workflow_dispatch:
jobs:
setup-and-deploy-layer:
runs-on: ubuntu-22.04
steps:
- name: Install Bun locally
uses: oven-sh/setup-bun@v1
with:
bun-version: latest
- name: Clone Bun repository
uses: actions/checkout@v4
with:
token: ${{ secrets.PAT_TOKEN }}
repository: oven-sh/bun
path: bun/
- name: Install dependencies
run: |
cd bun/packages/bun-lambda
bun install
bun install @oclif/plugin-plugins
- name: Set AWS credentials
uses: aws-actions/configure-aws-credentials@v4
with:
aws-access-key-id: ${{ secrets.AWS_ACCESS_KEY_ID }}
aws-secret-access-key: ${{ secrets.AWS_SECRET_ACCESS_KEY }}
aws-region: ${{ secrets.AWS_REGION}}
- name: Build and publish Bun layer
run: |
cd bun/packages/bun-lambda
bun run publish-layer -- \
--layer bun-layer \
--arch aarch64 \
--release latest \
--output ./bun-lambda.zip \
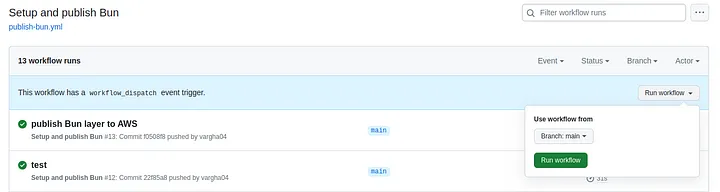
--region eu-west-2This file will use the previously created PAT_TOKEN to clone the latest Bun repository. After setting the necessary AWS credentials it pushes a Bun layer to AWS. This is a manual workflow, and it only needs to run if Bun’s version has changed and we would like to upgrade our layer.
How to trigger a manual workflow:

Before we could deploy our application we have to create a role that will allow our Lambda function to write logs into AWS Cloudwatch Logs. Create a create-role.yml file into .github/workflows and copy the following code:
create-role.yml
name: Create role
on:
  push:
    branches:
      - 'main'

env:
    ROLE_NAME: 'lambda-role-github'

jobs:
    create-role:
        runs-on: ubuntu-22.04
        steps:
            - name: Set AWS credentials
              uses: aws-actions/configure-aws-credentials@v4
              with:
                aws-access-key-id: ${{ secrets.AWS_ACCESS_KEY_ID }}
                aws-secret-access-key: ${{ secrets.AWS_SECRET_ACCESS_KEY }}
                aws-region: ${{ secrets.AWS_REGION}}

            - name: Create role for lambda
              run: |
                LAMBDA_ROLE=$(aws iam list-roles --query 'Roles[?RoleName==`${{ env.ROLE_NAME }}`]')
                if [ "$LAMBDA_ROLE" = [] ]; then
                    aws iam create-role --role-name ${{ env.ROLE_NAME }} --assume-role-policy-document '{"Version": "2012-10-17","Statement": [{ "Effect": "Allow", "Principal": {"Service": "lambda.amazonaws.com"}, "Action": "sts:AssumeRole"}]}'
                    aws iam attach-role-policy --role-name ${{ env.ROLE_NAME }} --policy-arn arn:aws:iam::aws:policy/service-role/AWSLambdaBasicExecutionRole;
                fi
It will create an AWS role with the name “lambda-role-github“ if it doesn’t already exist and attach the AWSLambdaBasicExecutionRole policy to it.
Now that we have a Bun layer and a role prepared, we can deploy our application. We will also need a separate workflow file for it, so create a deploy-function.yml and copy the code below:
deploy-function.yml
name: Deploy function
on:
  workflow_run:
    workflows: ["Create role"]
    branches: [main]
    types:
      - completed

env:
  FUNCTION_NAME: 'lambda-function-github'
  ARCHITECTURE: 'arm64'
  HANDLER: 'index.fetch'
  RUNTIME: 'provided.al2'
  LAYER_NAME: 'bun-layer'
  ROLE_NAME: 'lambda-role-github'


jobs:
    deploy-lambda-function:
      if: ${{ github.event.workflow_run.conclusion == 'success' }}
      runs-on: ubuntu-22.04
      steps:
        - name: Set AWS credentials
          uses: aws-actions/configure-aws-credentials@v4
          with:
            aws-access-key-id: ${{ secrets.AWS_ACCESS_KEY_ID }}
            aws-secret-access-key: ${{ secrets.AWS_SECRET_ACCESS_KEY }}
            aws-region: ${{ secrets.AWS_REGION}}

        - name: Checkout
          uses: actions/checkout@v4

        - name: Create lambda function
          run: |
            zip function.zip app/index.ts
            LAMBDA_FUNCTION=$(aws lambda list-functions --query 'Functions[?FunctionName==`${{ env.FUNCTION_NAME }}`]')
            LAYER_VERSION=$(aws lambda list-layers --query 'Layers[?LayerName==`bun-layer`].LatestMatchingVersion.Version | [0]')
            if [ "$LAMBDA_FUNCTION" = [] ]; then
              aws lambda create-function                                                \
                --function-name ${{ env.FUNCTION_NAME }}                                \
                --architectures ${{ env.ARCHITECTURE }}                                 \
                --zip-file fileb://function.zip                                         \
                --handler ${{ env.HANDLER }}                                            \
                --runtime ${{ env.RUNTIME }}                                            \
                --layers arn:aws:lambda:${{ secrets.AWS_REGION }}:${{ secrets.AWS_ID }}:layer:${{ env.LAYER_NAME }}:$LAYER_VERSION        \
                --role arn:aws:iam::${{ secrets.AWS_ID }}:role/${{ env.ROLE_NAME }};
            else
              aws lambda update-function-code             \
                --function-name  ${{ env.FUNCTION_NAME }}   \
                --zip-file fileb://function.zip;
            fi
It will first check if a function with the same name already exists. If it doesn’t exist then it will create it, and if it does exist it will only update it’s content. This workflow will only run if the previous one (create-role) succeeds.
This is an optional step, our workflow will work fine without it, but it is useful and recommended to use a versioning method on our releases. It will automatically create a version based on our commit message so we don’t have to spend time on versioning. Versioning also makes it easier to follow the changes during the development of the application.
Create a release.yml file and copy the following code:
release.yml
name: Semantic release
on:
  workflow_run:
    workflows: ["Deploy function"]
    branches: [main]
    types:
      - completed

jobs:
    semantic-release:
        if: ${{ github.event.workflow_run.conclusion == 'success' }}
        runs-on: ubuntu-22.04
        steps:
            - name: Checkout
              uses: actions/checkout@v4
              with:
                fetch-depth: 0
                token: ${{ secrets.PAT_TOKEN }}
            - name: Set up Node
              uses: actions/setup-node@v4
              with:
                node-version: 20
            - name: Set up Semantic Release
              run: |
                npm install -g semantic-release @semantic-release/gitlab-config @semantic-release/gitlab @semantic-release/git @semantic-release/changelog @semantic-release/exec conventional-commits-parser conventional-changelog-conventionalcommits
                curl -sSLo install.sh https://install.hclq.sh
                sh install.sh
            - name: Create version
              run: npx semantic-release
              env:
                GITHUB_TOKEN: ${{ secrets.PAT_TOKEN }}
After this workflow you should be able to see all your previous releases in the Releases section:
Here you will find an article about conventional commits to trigger semantic versioning.
Now you should be able to build your own workflow for your Bun applications and automatically deploy them to AWS with a single commit.
The benefits of an automatic workflow/pipeline is that you and your team can focus on developing your product and with a single commit and push your updated application will be published within minutes.
You can soon expect a similar guide for Gitlab CI as well.
Thank you for reading :)