
· 2 min read
Angular2 + S3 = Love (Deploy to cloud in 6 steps)
Beginners guide to deploy Angular 2 app to Amazon S3.

· 2 min read
Beginners guide to deploy Angular 2 app to Amazon S3.
First of all, you need an Angular app (if you haven’t got any). Install angular-cli with npm:
npm install -g @angular/cliAfter installation was successful create a new project:
ng new cloud_projectThis will install all dependencies, and everything you need (it takes a while).
Ok! We have a project. A new project folder was created, and contains all the files we need. We can now start our new app with:
cd cloud_project
ng serve
Visit your localhost:4200 in your browser. It’s working. Cool.
Angular CLI comes with Webpack module builder. Luckily we need exactly this. :) To build the app run this:
ng build --prod --aotAfter this, a new dist folder generated, which have the bundled files.
You have to register a new AWS account, if you haven’t any.
If you are a new user, the first year will be totally free. After 1 year it will be just simply cheap.
Sign in to AWS console!
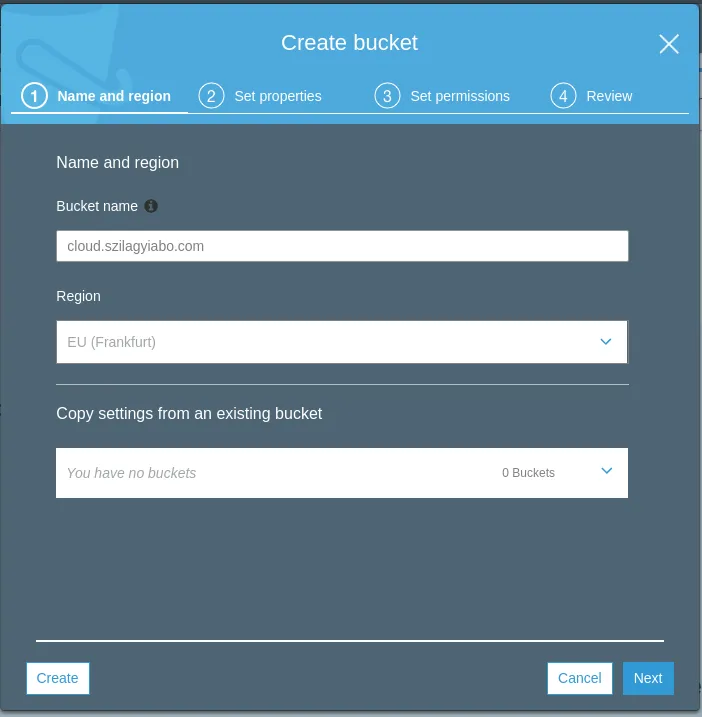
Create a new bucket! (Good naming convention cloud be like: cloud.szilagyiabo.com) We will upload our dist folder here.
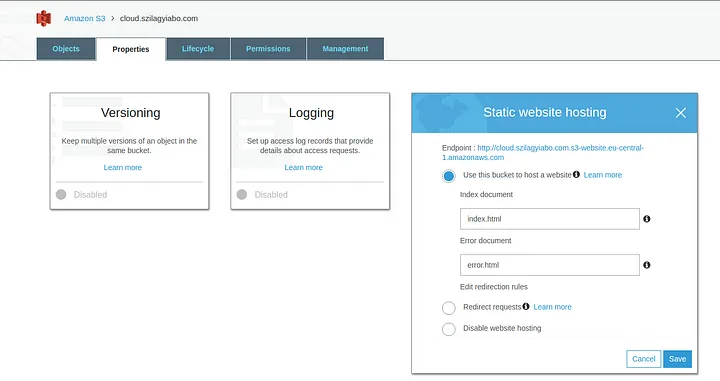
You need to configure the bucket a little. First thing first: Enable Static Website Hosting Index document: index.html Error document: error.html
You also need an Access Key, and Security Key. To generate one follow this link. These will be asked later.
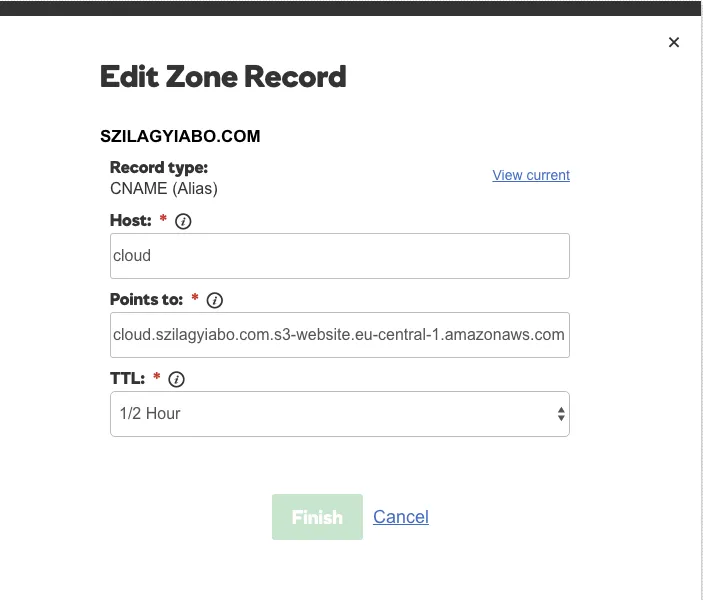
You have to add a new CName on your domain management site (I use GoDaddy). Hostname: cloud.szilagyiabo.com Points to: cloud.szilagyiabo.com.s3-website.eu-central-1.amazonaws.com TTL: 1/2 hours
If you want to automate your deploy process it is highly recommend to write a little script, which do the hard work.
First, we need a tool called AWS CLI. Let’s install it via pip:
pip install awscliNext we have to configure it:
aws configureThis will start an interactive shell, and ask for the Access Key, Security Key (generated earlier), and a passphrase for encrypting files, which could be anything.
After that, we can write our deploy script, and run it. The deploy.sh script will look like this:
#/bin/bash
#upload files
aws s3 cp ./dist s3://BUCKETNAME --recursive --acl public-read
Obviously you have to change the bucket name. :)
And that’s all.